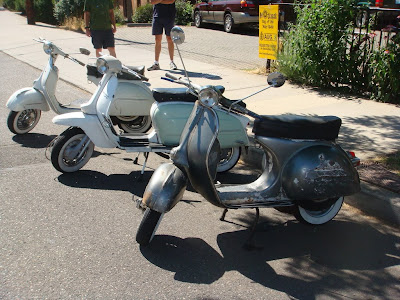
Here are a couple of before pics of the seat. Notice the original thick shaped pad.
.JPG)
.JPG) The seat frame was beadblasted and painted black. I was going to take it completely apart, but the blasting did a good enough job cleaning everything up that I didn't bother. It looks great and was an easy restore.
The seat frame was beadblasted and painted black. I was going to take it completely apart, but the blasting did a good enough job cleaning everything up that I didn't bother. It looks great and was an easy restore. .JPG)
.JPG) I got a Pascoli Mk2 black seatcover to replace the hand sewn cover. The original seat had the original padding which is cushy and comfy. The Pascoli is nice but has thinner foam between the vinyl cover and rubber base. The original foam is thicker and shaped to fill the space between the seat springs and the cover. I tried to put the original foam under the new seat cover but needed a structural backing to prevent the foam from squeezing between the springs. The original rubber backing was too thick so I tried a sheet of black polyethylene. It had the right amount of flex and was much thinner than the original rubber. When dry fitting, it looked like it would work, but when attaching the clips I found out that the stack of padding was a little too thick. So I backed up and put the original rubber (no padding) and the polyethylene under the new seat cover. This made for a good reasonably comfortable seat. Not as cushy as original, but better than the bare Pascoli. I can try again with the original pad if this setup isn't comfortable.
I got a Pascoli Mk2 black seatcover to replace the hand sewn cover. The original seat had the original padding which is cushy and comfy. The Pascoli is nice but has thinner foam between the vinyl cover and rubber base. The original foam is thicker and shaped to fill the space between the seat springs and the cover. I tried to put the original foam under the new seat cover but needed a structural backing to prevent the foam from squeezing between the springs. The original rubber backing was too thick so I tried a sheet of black polyethylene. It had the right amount of flex and was much thinner than the original rubber. When dry fitting, it looked like it would work, but when attaching the clips I found out that the stack of padding was a little too thick. So I backed up and put the original rubber (no padding) and the polyethylene under the new seat cover. This made for a good reasonably comfortable seat. Not as cushy as original, but better than the bare Pascoli. I can try again with the original pad if this setup isn't comfortable.
.JPG)
.JPG)
The seat frame was beadblasted and painted black. I was going to take it completely apart, but the blasting did a good enough job cleaning everything up that I didn't bother. It looks great and was an easy restore. I got a Pascoli Mk2 black seatcover to replace the hand sewn cover. The original seat had the original padding which is cushy and comfy. The Pascoli is nice but has thinner foam between the vinyl cover and rubber base. The original foam is thicker and shaped to fill the space between the seat springs and the cover. I tried to put the original foam under the new seat cover but needed a structural backing to prevent the foam from squeezing between the springs. The original rubber backing was too thick so I tried a sheet of black polyethylene. It had the right amount of flex and was much thinner than the original rubber. When dry fitting, it looked like it would work, but when attaching the clips I found out that the stack of padding was a little too thick. So I backed up and put the original rubber (no padding) and the polyethylene under the new seat cover. This made for a good reasonably comfortable seat. Not as cushy as original, but better than the bare Pascoli. I can try again with the original pad if this setup isn't comfortable.